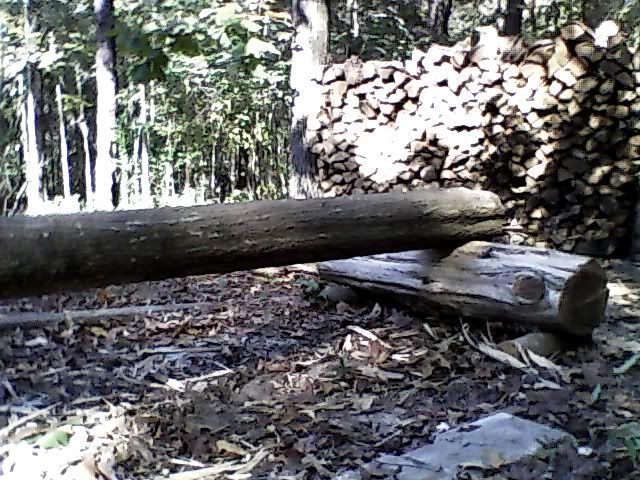
But with my single-minded, stubborn self, dragging it in a straight line with brute force was as far as I thought on the subject. Don't have a horse, cow, or 4-wheeler to pull logs with. At any rate, three hours of pulling relocated an 18-foot, 10-inch diameter water oak log to the front yard, where I chopped a v-notch about a foot from each end and hooched it onto a pair of cedar logs I'm using for sawhorses. The notches at either end prevented the oak log from rocking atop the sawhorses.
Don't have any log dogs yet, but those are on the list. Might talk to a friend who welds and see if I can have some made pretty cheap. Now, the log's ready to be hewn. Normally, I just visualize the line and start notching, adjusting and altering my depth as I go. But in this case, I wanted to make a picture-perfect timber with good straight edges. So I broke out the square and chalk line.
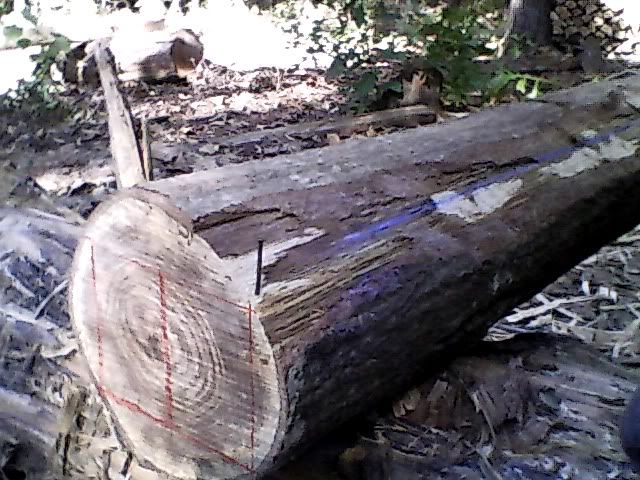
Place a level or ruler against the small end of the log where you'd like to mark your top line. Make sure it's level, then use a marker or pencil to draw the line. Using a carpenter's square (the one pictured is from Scotland, and it's roughly 150 years old. Got it for free from an antique tool enthusiast) It's not perfectly true, which is likely why it was free...but I love it anyway.
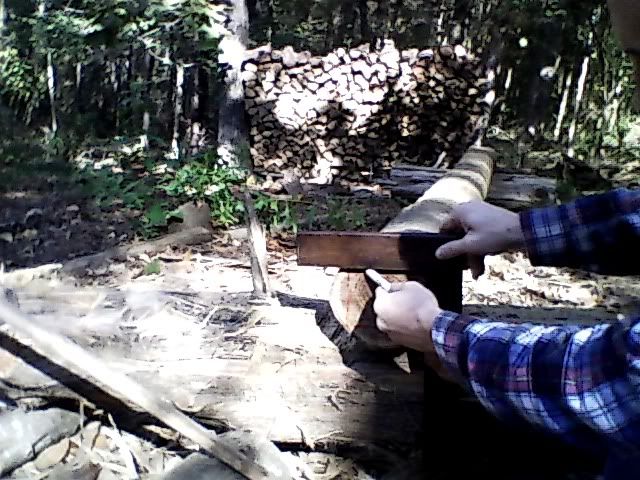
Take a draw-knife (bought from the same guy as the square; it's a foot wide and cost $20) and, starting at the top left or top right of your square, shave the bark in a straight line from one end of the log to the other. This will allow your chalk line to pop without catching or smearing on the rough bark. Don't shave the whole log or it'll be wet and slippery. Just shave in a line the full length of the log.
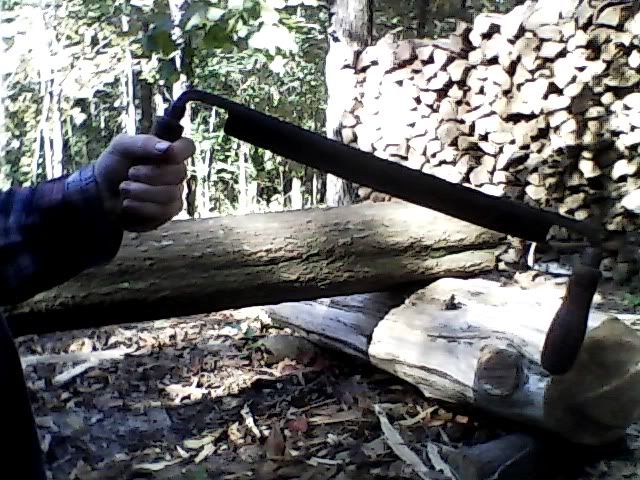
Drive a nail into the end of the log, in line with your top right or left corner, then hook a chalk line to the nail, stretch it across the log in a straight line, and pop a line. That line will guide the depth of your notches later on. Mark your four sides on the large end of the log, using the chalk line to line up your square.
Stand on top of the log and swing the axe down and between your legs. Notch to the line, or just before it, depending on the number and depth of the tool marks you want showing on the finished product.
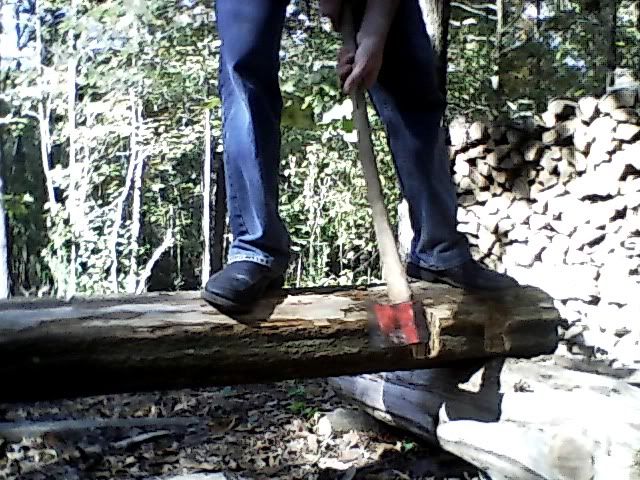
Notch about 6-12 inches apart. Once you finish, your log will look like this:
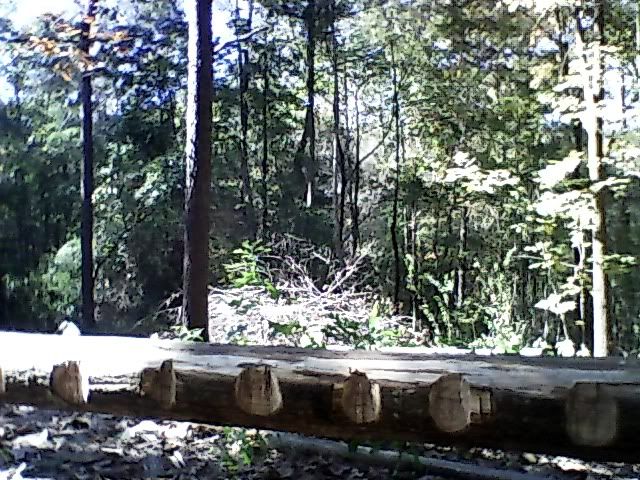
These notches are wide and messy, but they improved with each side of the log that I worked on. The tighter and more v-shaped you can make them, the easier your life will be during the next step. Now that you're done notching, start at the large end of the log and split off the "juggles". Juggles, as they're called, are the chunks of wood between your notches. Swing the axe at about a 45 degree angle into the edge of the juggle, and it ought to split cleanly away from the log. If not, just work your axehead deeper and try to pop it loose. This step is called, as you might expect, juggling.

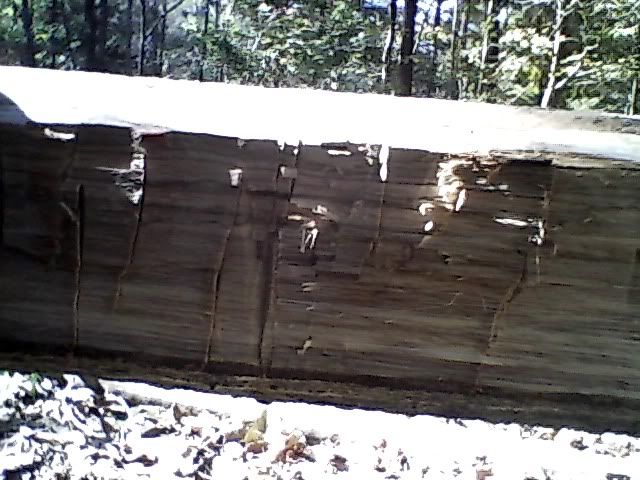
When you're finished juggling the log, it'll look like this:
Now, get back on the log and use your felling axe to find high spots or sections that didn't pop off to the line and score them lightly. This is the prep work for your broad-axe. It allows you to spend just a few minutes hewing with the broad-axe instead of hours bent over with that heavy monster. The more work you can do with the smaller axe, the better off you'll be. After scoring, your log will look like this:
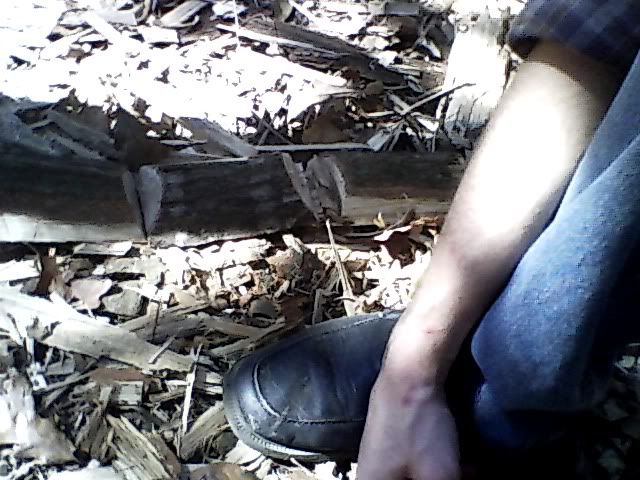
Now you're all set. Before beginning work with the broad-axe, get your juggles and line them up on the ground beneath the log, running down it's length. This will give your broad-axe a cushion of wood to slice into if you miss the log or swing too hard and follow through to the ground. Otherwise, you'll dull the blade on dirt and rocks.
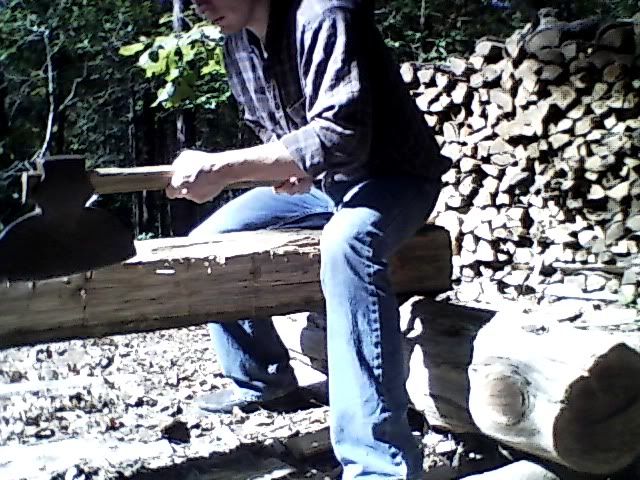
Starting at the large end, use your broad-axe to shave off the scored portion of the log, hopefully leaving a smooth, flat surface behind. Work backward toward the small end. It's much easier to hew working backward than it is to lean forward and work ahead.
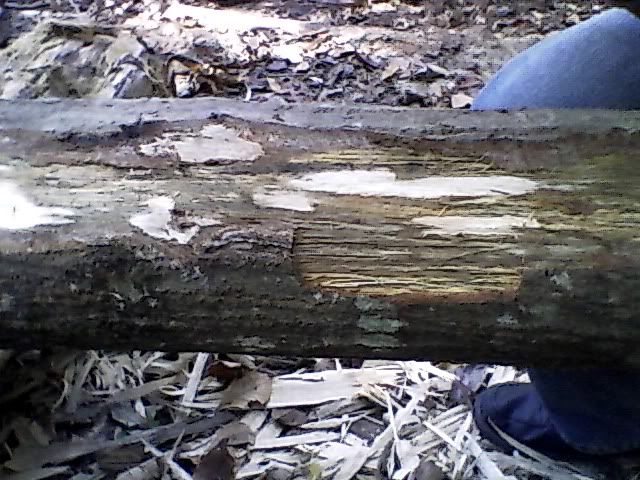
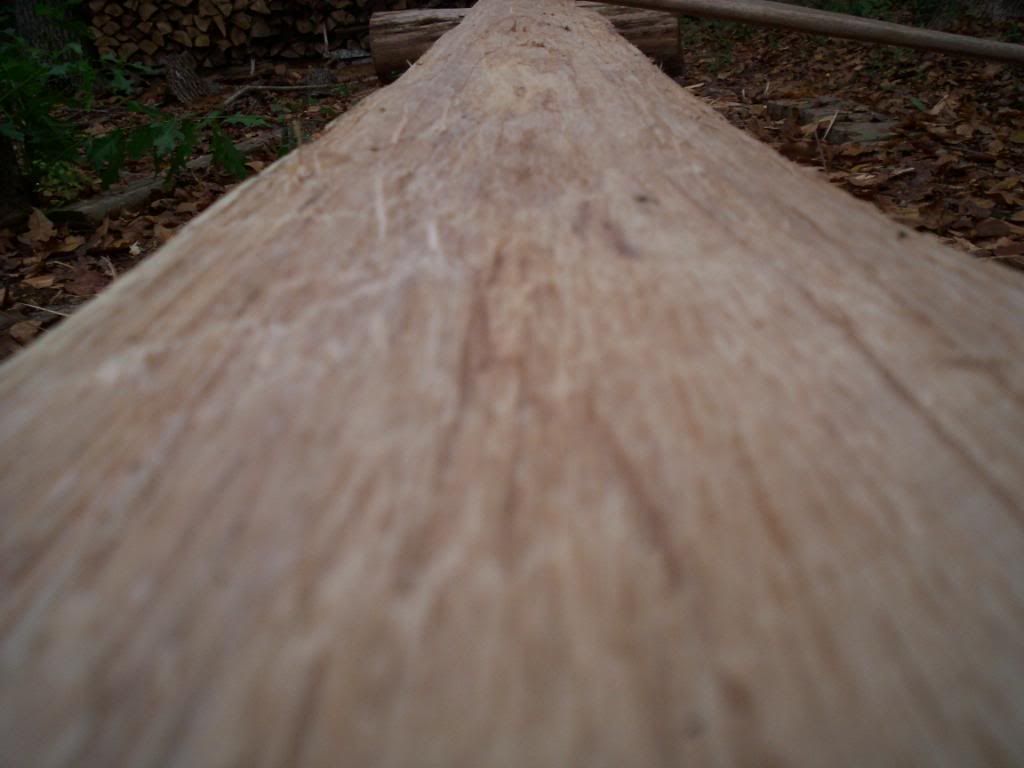
When you reach the end of the log, it should be smooth and flat, with a few tool-marks here and there where you might have cut too deep or too close to the edge. I like to call those"character marks".
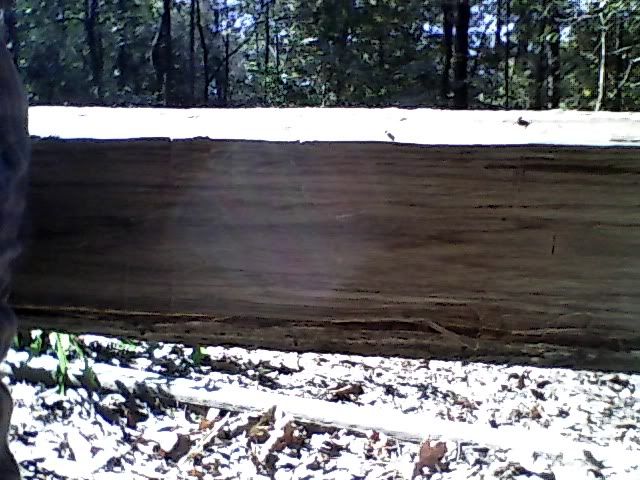
You'll drive yourself crazy trying to get a timber without them, or you'll spend so much time on one log that hewing ceases to be fun and productive. It CAN be done, but it's not worth the time and effort, to me. If you're a perfectionist, have at it! Otherwise, accept a few marks and start on the next log.
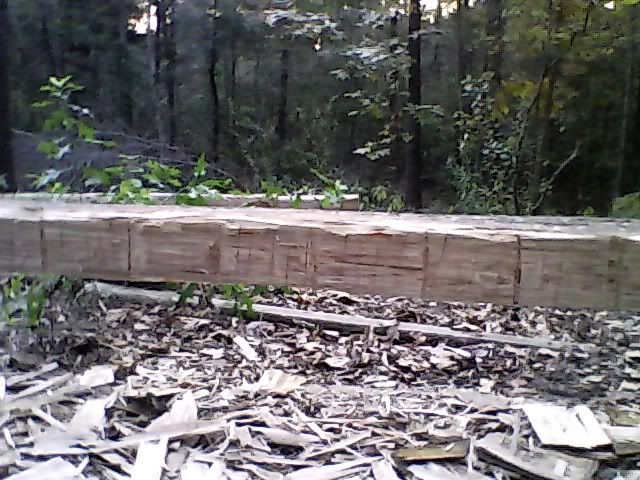
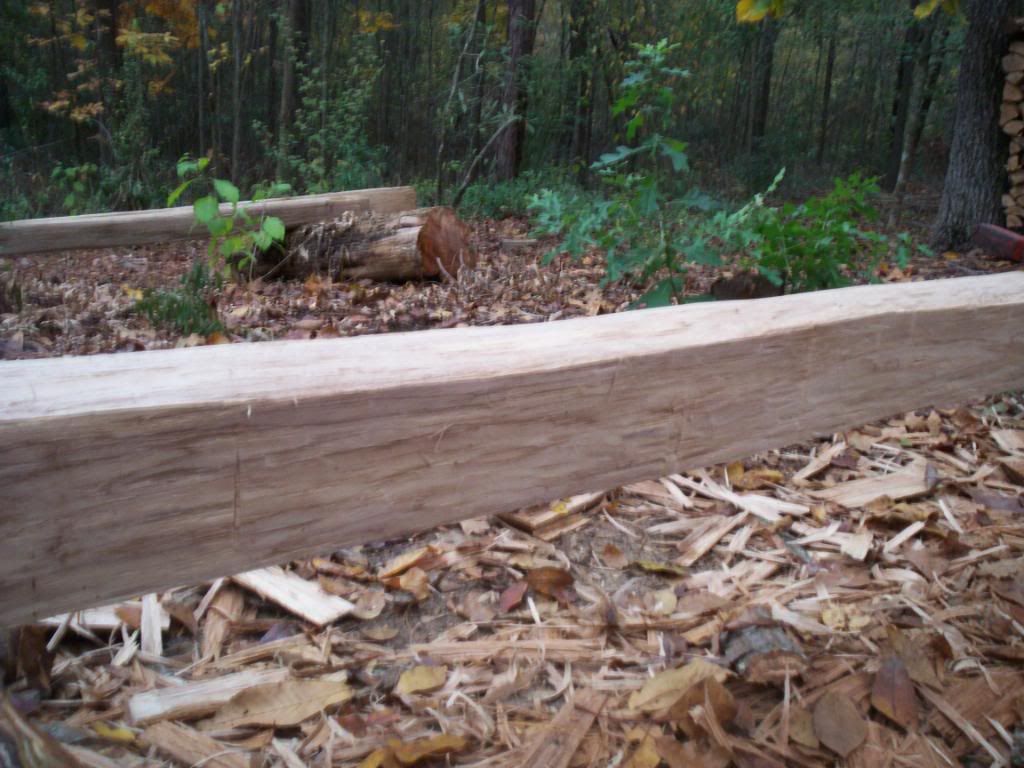
It's best to hew both the left and right sides before turning the log to hew the other two sides. It saves you a lot of handling and time. Here's the finished product:
If you want to soften the tool-marks, get a draw-knife and, slicing perpendicular to the grain of the wood, lightly shave down the area around the marks. It'l make them less noticeable. I do this with the most obvious marks.
And there you have it. Step-by-step hewing. I apologize for my disjointed teaching style and my jumbled writing; I'm not a teacher or a great writer, but I like to think I'm a decent hand with a broad-axe. Still got a long way to go, though!
Enjoy.
No comments:
Post a Comment