It's been three weeks since I stopped to post here, but I haven't forgotten you folks (yes, all two of you)! Work has been crazy, holidays have come and gone, and I'm exhausted. But I've found a day or two to work on materials for my future cabin. A couple weeks ago I visited a friend who's cutting some pine trees to make room for a new house that he and his wife are building. He offered them to me for nothing, so we spent a couple days cutting, limbing, and loading them on a trailer to haul. Got several fantastic 16-25 foot logs out of the deal, and several more are laying on the ground waiting to be picked up...as soon as this nasty, muddy winter rain lets up.
Another stroke of luck came of that visit. The guy's parents heard what I want to do (build log structures) and thought it would be fun to build a small (10X10) cabin for their grandson. They have several huge old longleaf pine on the property, and once cut and split lengthwise they'll make fine cabin logs. Whatever's left of them after I build it is mine to keep, along with enough other timber to equal my labor cost. I like that deal.
Been working for another friend clearing out her yard. There are 20 or so old, fairly straight popcorn trees laying down; think I'll build a doghouse for our pooch or a rough little shed from those. Her neighbor, a very nice older lady, offered me free run of her six acres to cut whatever I pleased for firewood or logs in return for a little brush clearing. I like that deal, too! She's got some nice, straight trees on the back side of her place, so I might have to get at it.
To accomplish all this good stuff, I had to have a new chainsaw. The old Poulan Pro was great while it lasted, and it still works, but it vibrates a lot and just isn't as powerful as I wanted. After selling a couple of things, I made enough money to buy a brand new Stihl Farmboss with a 50cc engine and 18'' bar. It's a monster on a fresh, green log. I've gotten spoiled. Runs clean, doesn't vibrate, and knifes through anything I touch. Nice!
I'm calling a gentleman today about a few lighter'd blocks for the foundation of my little cabin at home. If what he has is the proper size and price, that's what I intend to use. If not, then concrete block piers it is. Simple, cheap, and while not the best to look at...it gets the job done. So far, it looks like it will be white oak for my two sill logs (the longest logs running down the left and right sides of the cabin), oak floor joists, pine and poplar for the wall logs, rafters, and tie beams, and whatever else is handy for the porch. If I get enough pine from my friend's place, though, everything save the sills and joists will be pine. It's a matter of supply, you know?
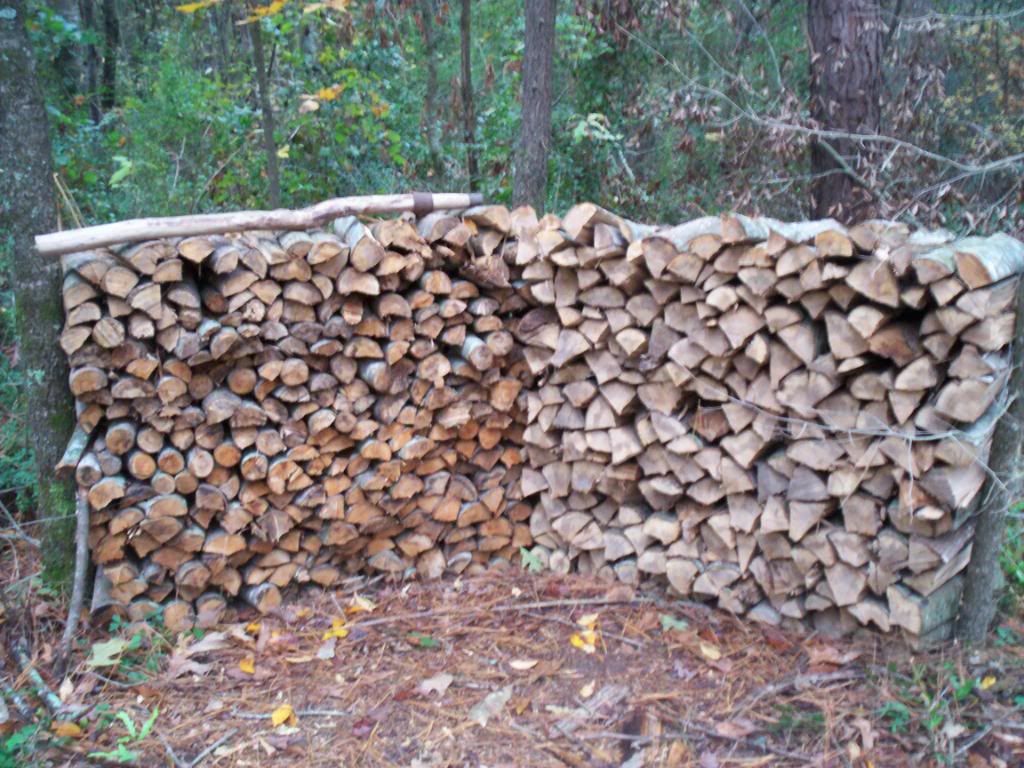
At any rate, I'll be posting pictures of my growing log pile and the foundation, once I've got things started. Till then--God bless!
Friday, December 30, 2011
Saturday, December 10, 2011
The week of Thanksgiving, a local homestead and village had its fall open house.
It's called Landrum's Country, and it's located in the piney woods
of Jones County. A picket fence, reconstructed log cabins, a quaint
chapel, and an endless line of stores, food vendors, and fun activities
provide a wealth of entertainment for visitors of all ages. Had I thought
about it, I'd have taken more pictures to give you an idea of what it
looks like. There's so much to see, from a grist mill to an old cypress
pirogue, wagons, plows, antique tools, tractors, local artifacts, and
plenty more.
A band of Confederate reenactors (some of my best buds and campmates)
puts on a mock battle with a band of Yankees each year. I abstained this year,
choosing to sit by the fire and eat their fine "possum" soup. It's really
turkey, but you get such a fun reaction when you tell folks it's possum.
We've debated catching a possum and keeping him in a cage near the fire,
in case we run out of turkey next year.
Anyway, on to the point! The old cabins and log homes on the place caught
my eye, and I went on an exploratory journey. There's an old dogtrot
they've framed in, adding a hallway and a nice parlor, a log corn crib,
and several round-log cabins from the area. One of those cabins was built
during the War. If you live in the South, you don't need to specify
"which" war. It's just The War, and we all know you're referring to the
northern invasion. Around 1863, a local soldier came home on leave and
built himself a split-log cabin of clear pine logs about 8-10 inches in
diameter.
I'd never seen such a snug cabin built of halved logs, and it gave me
some inspiration. The notches are simple square notches, and whoever
restored the cabin spiked them with nails for added support. It's roughly
11X11 on the exterior, and 10X10 on the inside. A low ceiling and solid
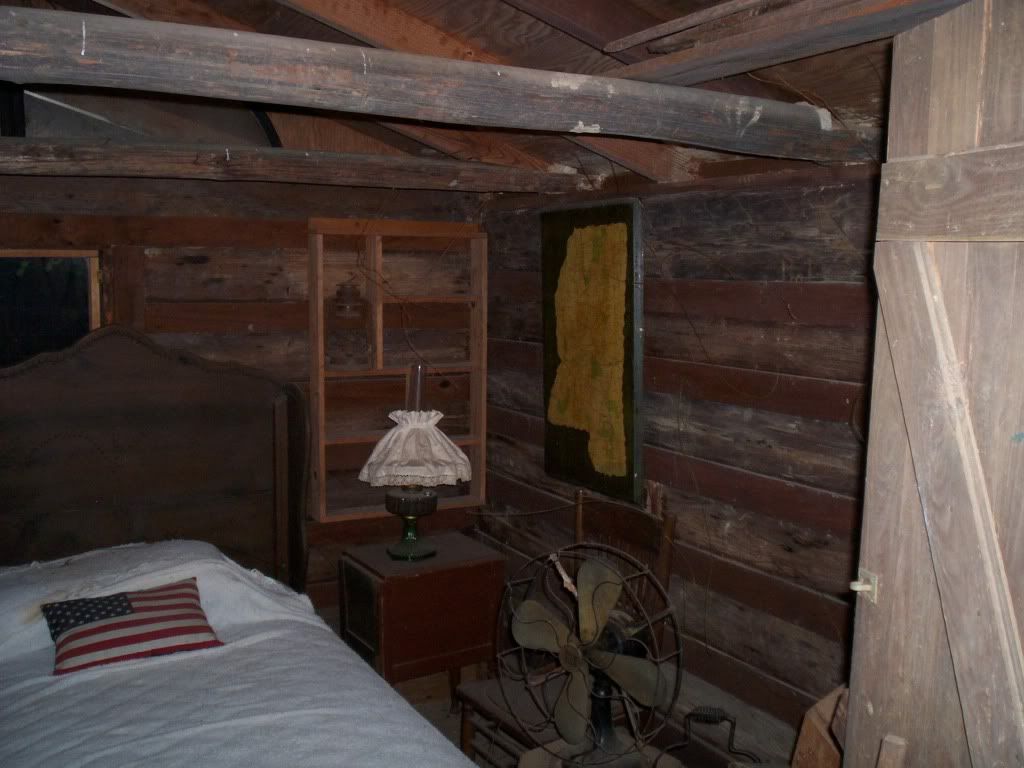
tie-beams, coupled with the inviting porch and gleaming lamp, offered an
inviting glimpse of the past.
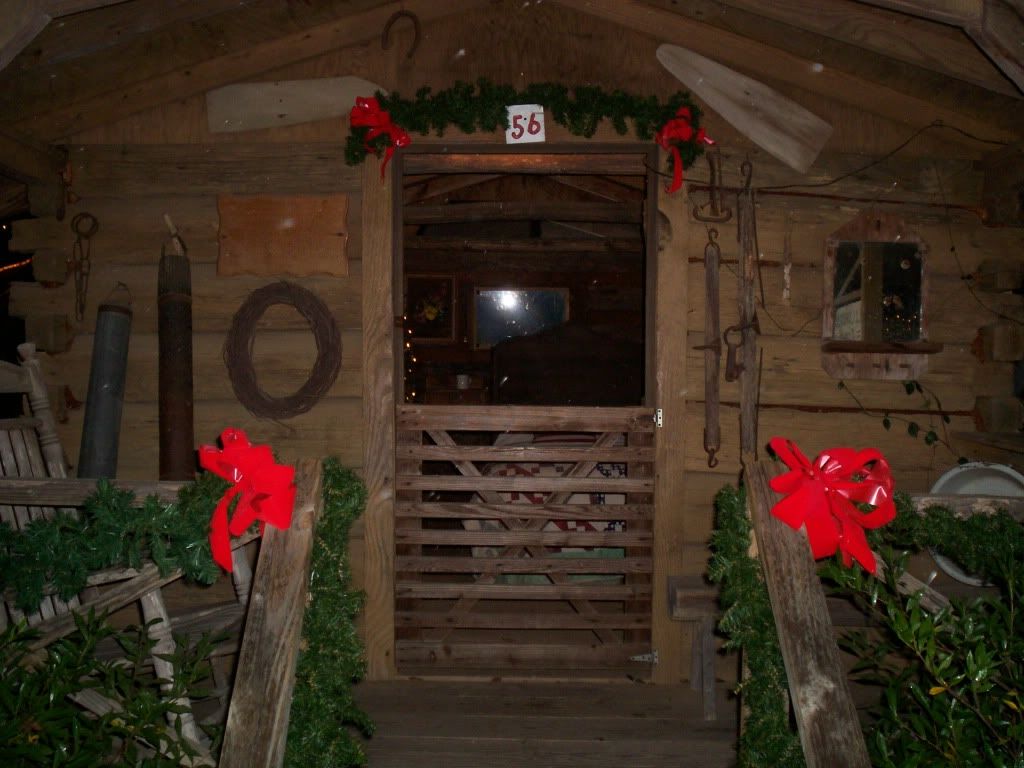
Here's a look at the inside:

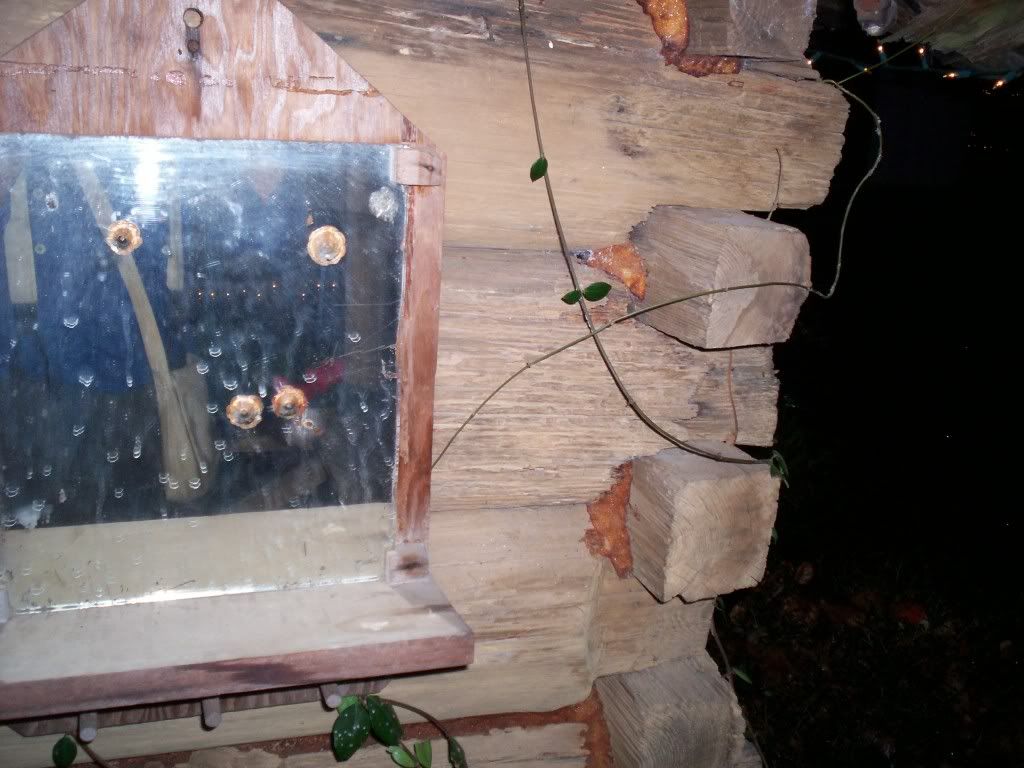
The square notches:
One side:
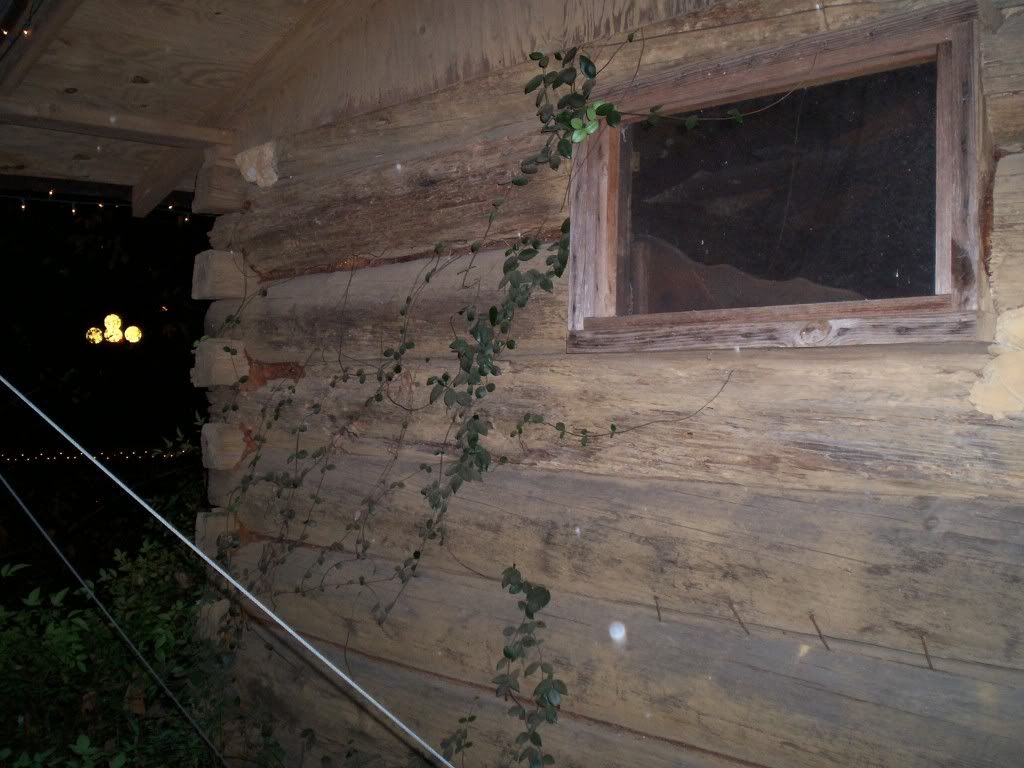
The other side:
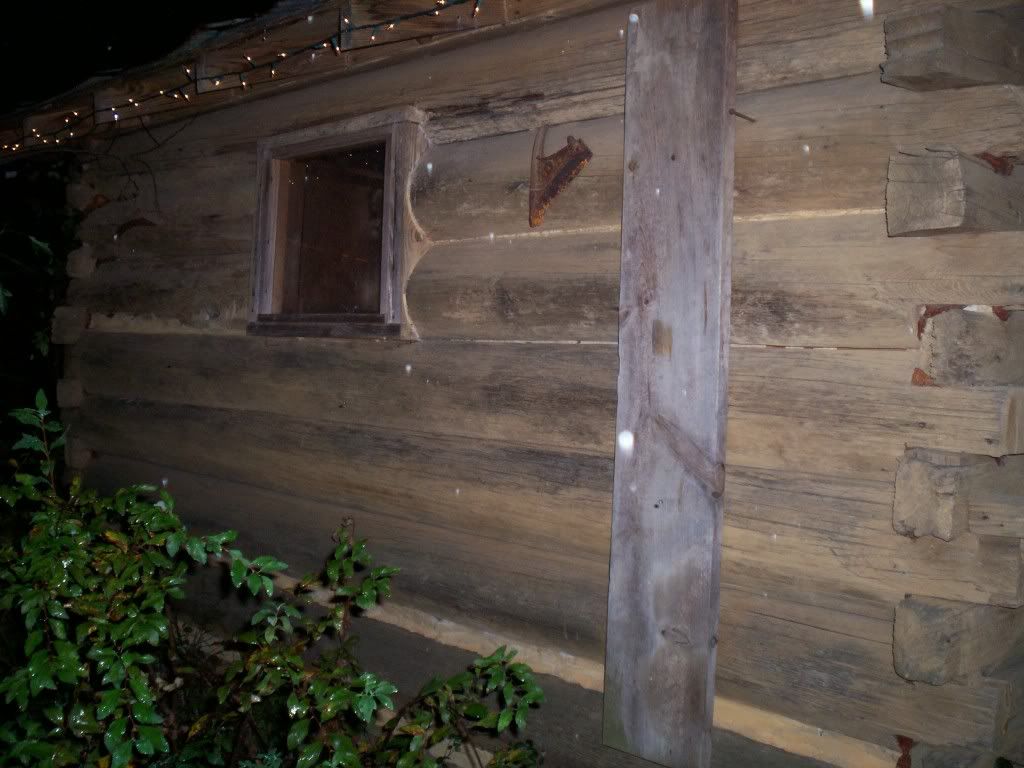
A sealed wall where the old hearth used to be:
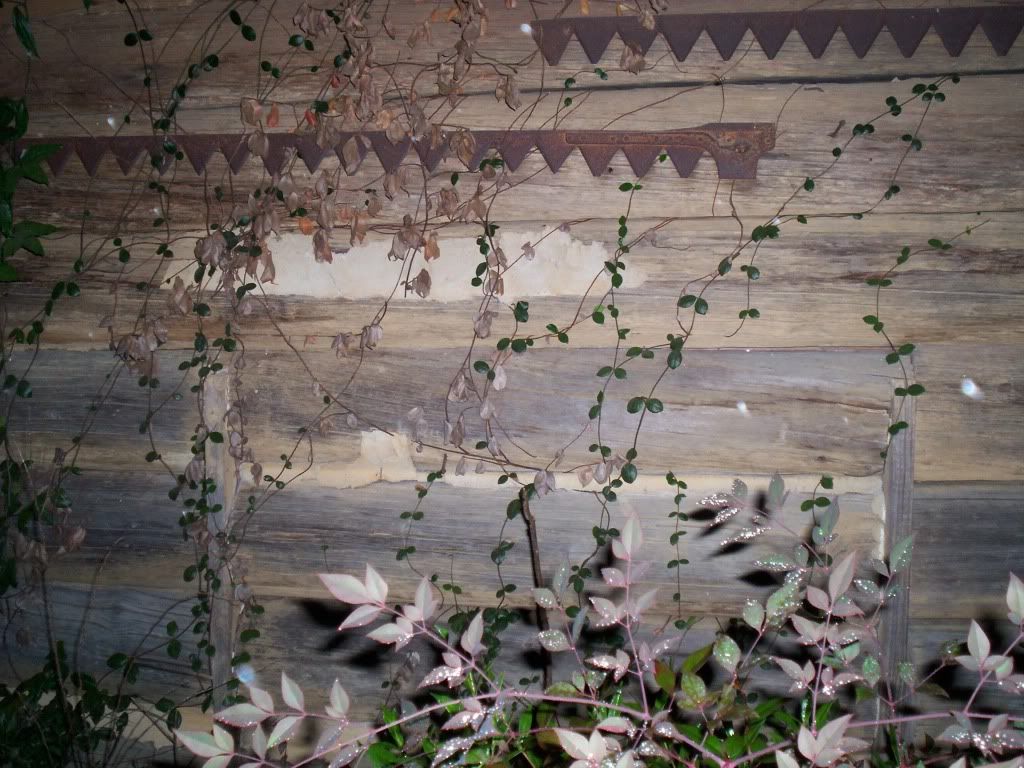
Here's a shot of the narrrow strips placed along the butted log sides. I
imagine they were placed there to have a backstop for the chinking.
Next time we go, I'll get pictures of all the other buildings. There are
some fine examples of deep south cabin-craft, as I call it. The little
cabin we've been looking at here gave me several ideas, not least of
which was using split logs. For such a small cabin (10X10), and in our
very mild climate (it rarely dips below 30 in the winter, and never lasts
more than a few days even at that temperature), 4-5 inches of log wall
would provide plenty of insulation. The narrowest part of these logs are
about 4 inches. It looks like the builder split the logs, then hewed or
adzed the tops and bottoms to a flat surface. After notching, they sat
directly on each other and provided a tight seal. A small bead of
chinking would have been plenty to provide protection from the elements.
Due to extra hours at work and the obligations of the Christmas season, I
haven't done much toward building my little cabin, but I'm planning to mark
off the foundation and figure out whether we're using cinder blocks, bricks,
treated posts, or lighter'd chunks, if I can find them. If you don't know what
lighter'd is, stay tuned and I'll post some nice pictures of these beautiful old
pine knots.
It's called Landrum's Country, and it's located in the piney woods
of Jones County. A picket fence, reconstructed log cabins, a quaint
chapel, and an endless line of stores, food vendors, and fun activities
provide a wealth of entertainment for visitors of all ages. Had I thought
about it, I'd have taken more pictures to give you an idea of what it
looks like. There's so much to see, from a grist mill to an old cypress
pirogue, wagons, plows, antique tools, tractors, local artifacts, and
plenty more.
A band of Confederate reenactors (some of my best buds and campmates)
puts on a mock battle with a band of Yankees each year. I abstained this year,
choosing to sit by the fire and eat their fine "possum" soup. It's really
turkey, but you get such a fun reaction when you tell folks it's possum.
We've debated catching a possum and keeping him in a cage near the fire,
in case we run out of turkey next year.
Anyway, on to the point! The old cabins and log homes on the place caught
my eye, and I went on an exploratory journey. There's an old dogtrot
they've framed in, adding a hallway and a nice parlor, a log corn crib,
and several round-log cabins from the area. One of those cabins was built
during the War. If you live in the South, you don't need to specify
"which" war. It's just The War, and we all know you're referring to the
northern invasion. Around 1863, a local soldier came home on leave and
built himself a split-log cabin of clear pine logs about 8-10 inches in
diameter.
I'd never seen such a snug cabin built of halved logs, and it gave me
some inspiration. The notches are simple square notches, and whoever
restored the cabin spiked them with nails for added support. It's roughly
11X11 on the exterior, and 10X10 on the inside. A low ceiling and solid
tie-beams, coupled with the inviting porch and gleaming lamp, offered an
inviting glimpse of the past.
The plywood used in the reconstruction of the roof, along with the modern
nails and modern materials used to replace cracked chinking, made my
inner log purist snarl...but hey--it's much better than no roof and big
gaps between the logs, right? Some of the logs on the back side are in
pretty rough shape with large, gaping cracks and chunks missing; I hope
they're planning on sealing them somehow. I'd hate to see such an amazing
old building crumble away. I'm glad people like the Landrums care enough
about our local history to rescue such old barns, cabins, and outbuildings. If
I had the money, I'd be doing the exact same thing. More power to you, Mr. Tom!
Here's a look at the inside:
The square notches:
The other side:
A sealed wall where the old hearth used to be:
Here's a shot of the narrrow strips placed along the butted log sides. I
imagine they were placed there to have a backstop for the chinking.
Next time we go, I'll get pictures of all the other buildings. There are
some fine examples of deep south cabin-craft, as I call it. The little
cabin we've been looking at here gave me several ideas, not least of
which was using split logs. For such a small cabin (10X10), and in our
very mild climate (it rarely dips below 30 in the winter, and never lasts
more than a few days even at that temperature), 4-5 inches of log wall
would provide plenty of insulation. The narrowest part of these logs are
about 4 inches. It looks like the builder split the logs, then hewed or
adzed the tops and bottoms to a flat surface. After notching, they sat
directly on each other and provided a tight seal. A small bead of
chinking would have been plenty to provide protection from the elements.
Due to extra hours at work and the obligations of the Christmas season, I
haven't done much toward building my little cabin, but I'm planning to mark
off the foundation and figure out whether we're using cinder blocks, bricks,
treated posts, or lighter'd chunks, if I can find them. If you don't know what
lighter'd is, stay tuned and I'll post some nice pictures of these beautiful old
pine knots.
Monday, November 14, 2011
How I hew a log
I finally broke down and bought a come-along. It was $40 for a one-ton with 12 feet of cable; the gent at the counter saw me grimacing as he scanned it, so he took pity and knocked the price down to $30. After getting home and heading out to an oak log I'd cut some weeks before, I hooked up to one end of the log and tied the come-along off to a tree. Then we started the journey, 12 painfully slow feet at a time, from the far side of my property to the front yard where I prefer to work. My grandpa has since suggested a couple of more efficient methods for my next log-pulling venture, so I'll explain those in the next post or two.
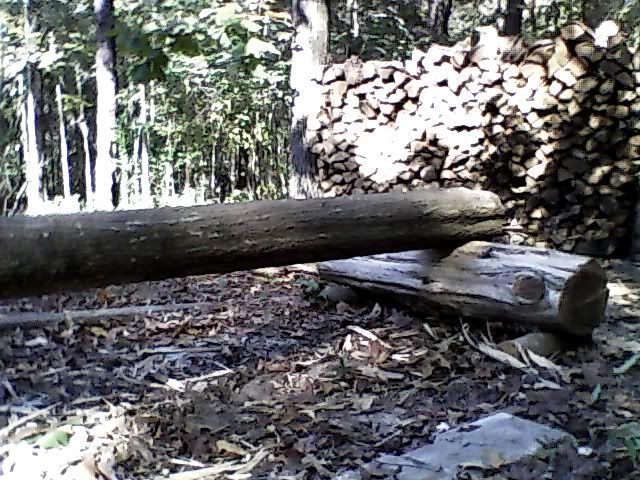
But with my single-minded, stubborn self, dragging it in a straight line with brute force was as far as I thought on the subject. Don't have a horse, cow, or 4-wheeler to pull logs with. At any rate, three hours of pulling relocated an 18-foot, 10-inch diameter water oak log to the front yard, where I chopped a v-notch about a foot from each end and hooched it onto a pair of cedar logs I'm using for sawhorses. The notches at either end prevented the oak log from rocking atop the sawhorses.
Don't have any log dogs yet, but those are on the list. Might talk to a friend who welds and see if I can have some made pretty cheap. Now, the log's ready to be hewn. Normally, I just visualize the line and start notching, adjusting and altering my depth as I go. But in this case, I wanted to make a picture-perfect timber with good straight edges. So I broke out the square and chalk line.
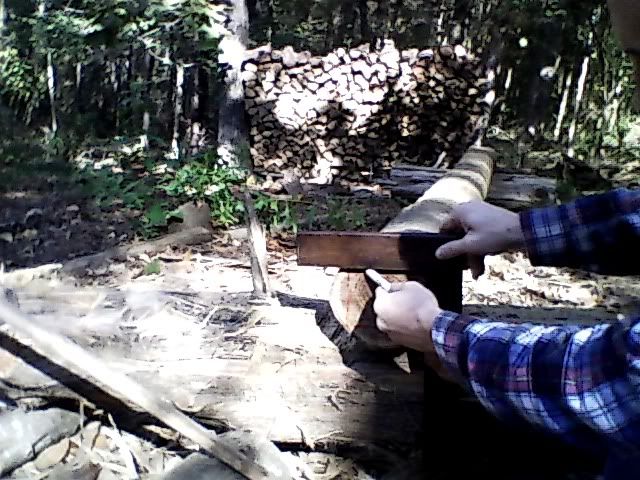
Place a level or ruler against the small end of the log where you'd like to mark your top line. Make sure it's level, then use a marker or pencil to draw the line. Using a carpenter's square (the one pictured is from Scotland, and it's roughly 150 years old. Got it for free from an antique tool enthusiast) It's not perfectly true, which is likely why it was free...but I love it anyway.
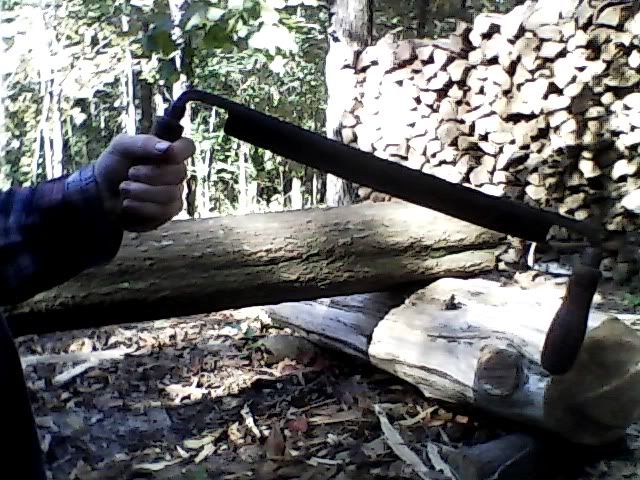
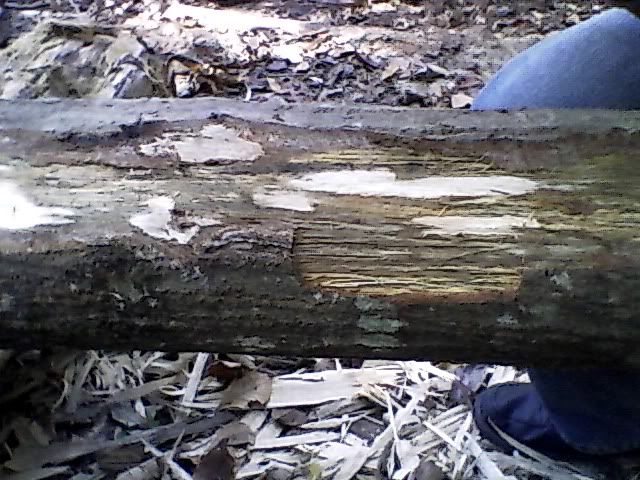
Take a draw-knife (bought from the same guy as the square; it's a foot wide and cost $20) and, starting at the top left or top right of your square, shave the bark in a straight line from one end of the log to the other. This will allow your chalk line to pop without catching or smearing on the rough bark. Don't shave the whole log or it'll be wet and slippery. Just shave in a line the full length of the log.
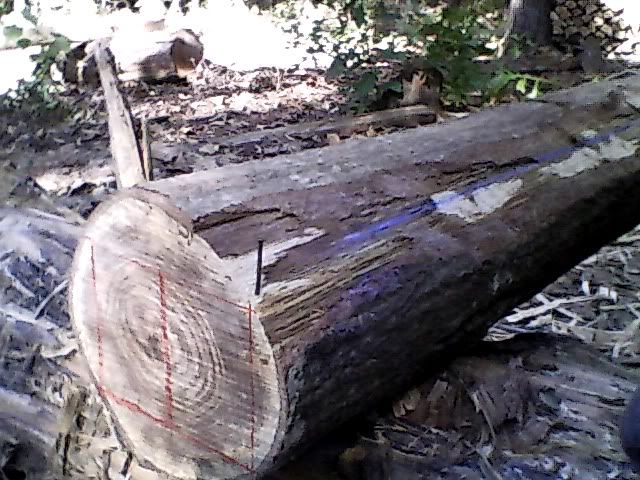
Drive a nail into the end of the log, in line with your top right or left corner, then hook a chalk line to the nail, stretch it across the log in a straight line, and pop a line. That line will guide the depth of your notches later on. Mark your four sides on the large end of the log, using the chalk line to line up your square.
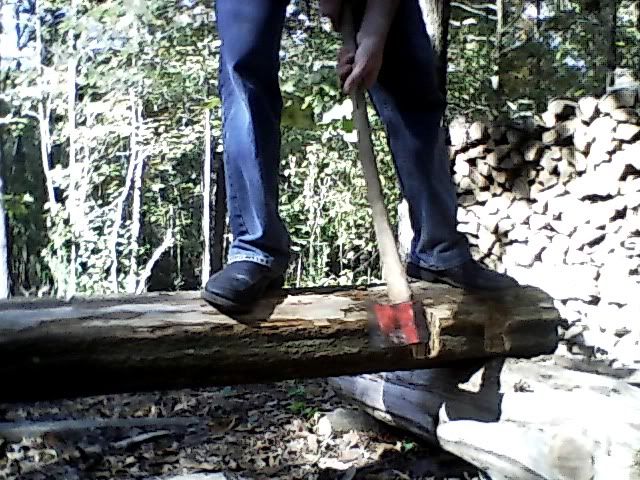
Stand on top of the log and swing the axe down and between your legs. Notch to the line, or just before it, depending on the number and depth of the tool marks you want showing on the finished product.
Notch about 6-12 inches apart. Once you finish, your log will look like this:
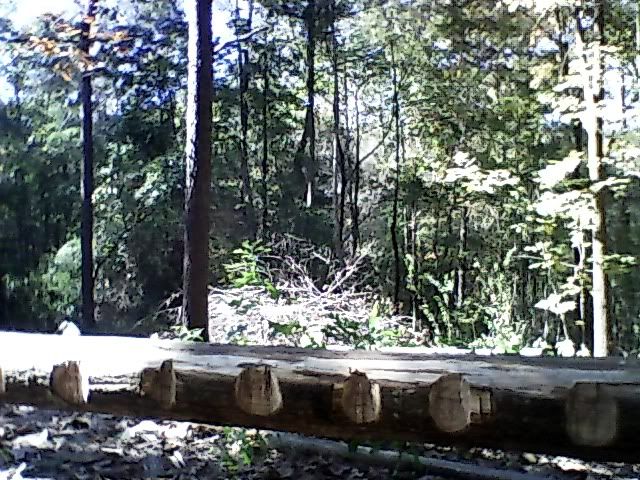
These notches are wide and messy, but they improved with each side of the log that I worked on. The tighter and more v-shaped you can make them, the easier your life will be during the next step. Now that you're done notching, start at the large end of the log and split off the "juggles". Juggles, as they're called, are the chunks of wood between your notches. Swing the axe at about a 45 degree angle into the edge of the juggle, and it ought to split cleanly away from the log. If not, just work your axehead deeper and try to pop it loose. This step is called, as you might expect, juggling.

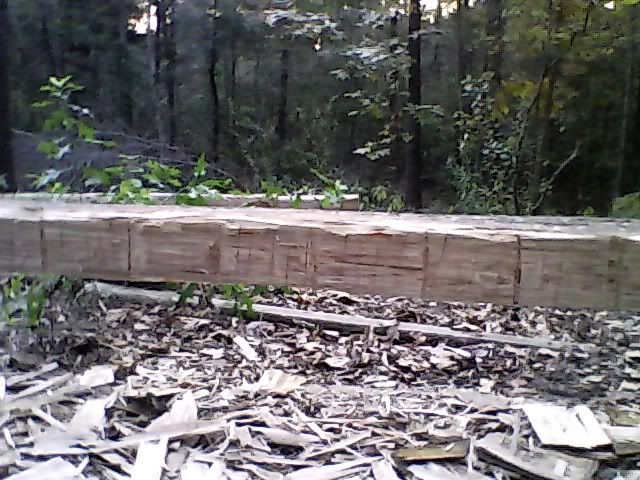
When you're finished juggling the log, it'll look like this:
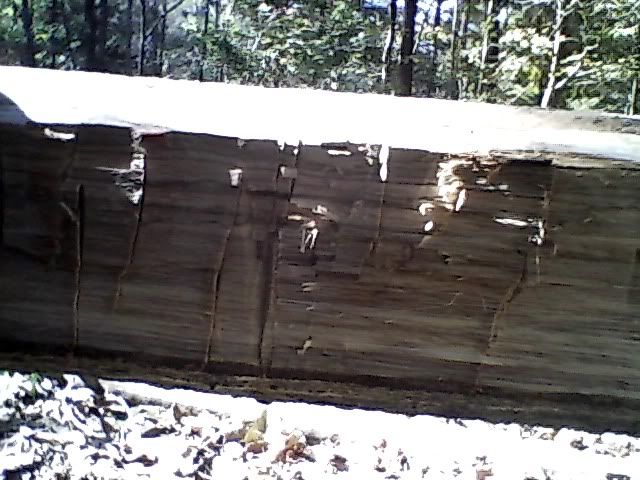
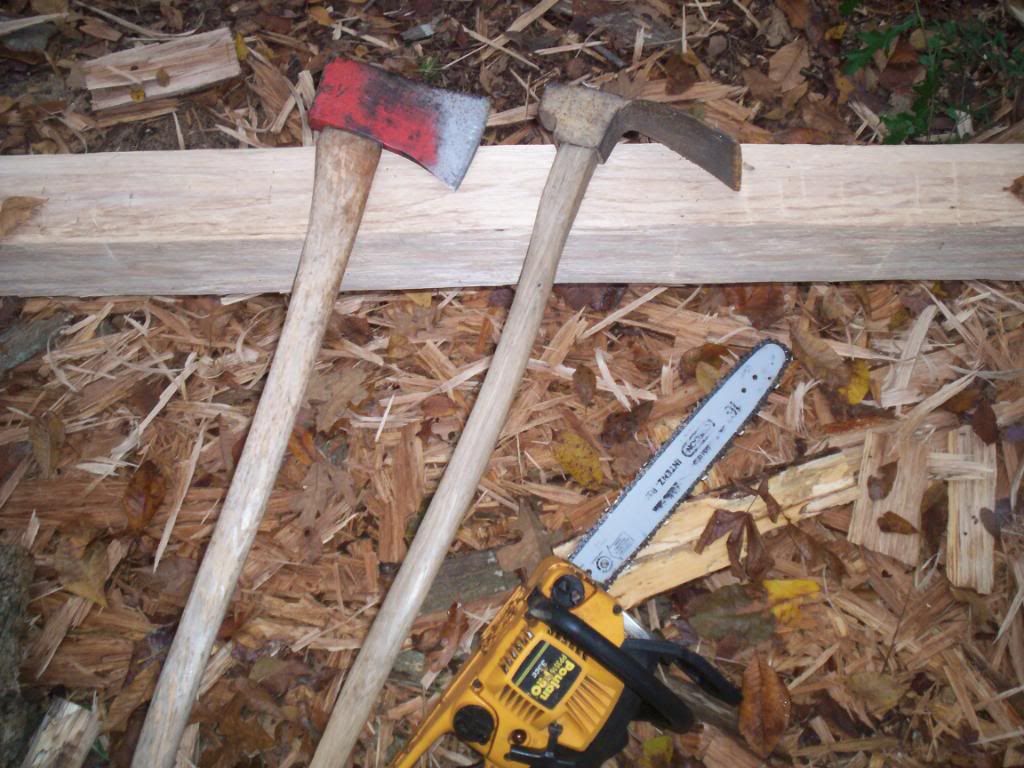
Now, get back on the log and use your felling axe to find high spots or sections that didn't pop off to the line and score them lightly. This is the prep work for your broad-axe. It allows you to spend just a few minutes hewing with the broad-axe instead of hours bent over with that heavy monster. The more work you can do with the smaller axe, the better off you'll be. After scoring, your log will look like this:
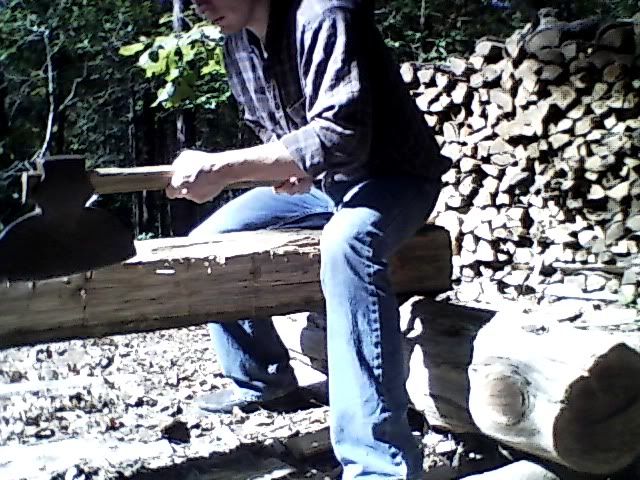
Now you're all set. Before beginning work with the broad-axe, get your juggles and line them up on the ground beneath the log, running down it's length. This will give your broad-axe a cushion of wood to slice into if you miss the log or swing too hard and follow through to the ground. Otherwise, you'll dull the blade on dirt and rocks.

Starting at the large end, use your broad-axe to shave off the scored portion of the log, hopefully leaving a smooth, flat surface behind. Work backward toward the small end. It's much easier to hew working backward than it is to lean forward and work ahead.
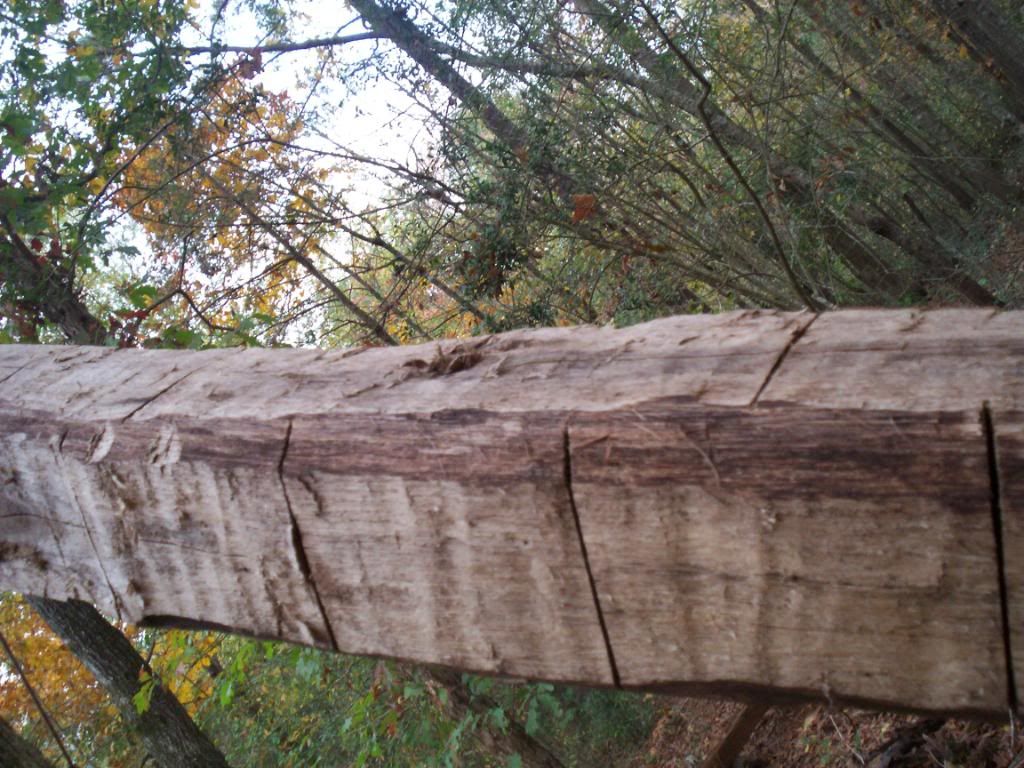
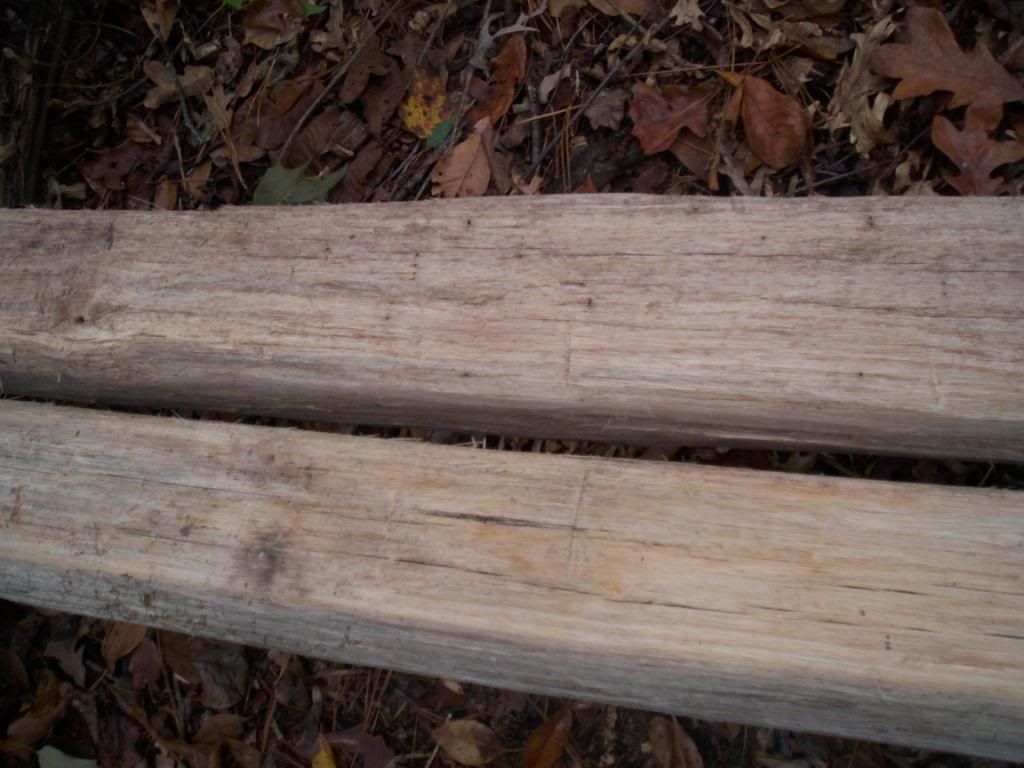
When you reach the end of the log, it should be smooth and flat, with a few tool-marks here and there where you might have cut too deep or too close to the edge. I like to call those"character marks".
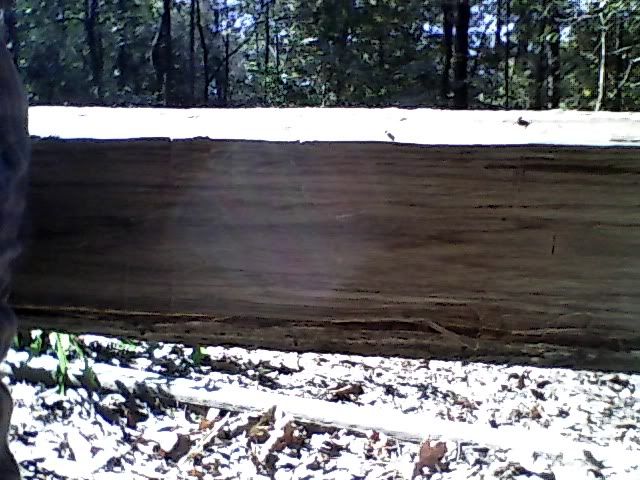
You'll drive yourself crazy trying to get a timber without them, or you'll spend so much time on one log that hewing ceases to be fun and productive. It CAN be done, but it's not worth the time and effort, to me. If you're a perfectionist, have at it! Otherwise, accept a few marks and start on the next log.
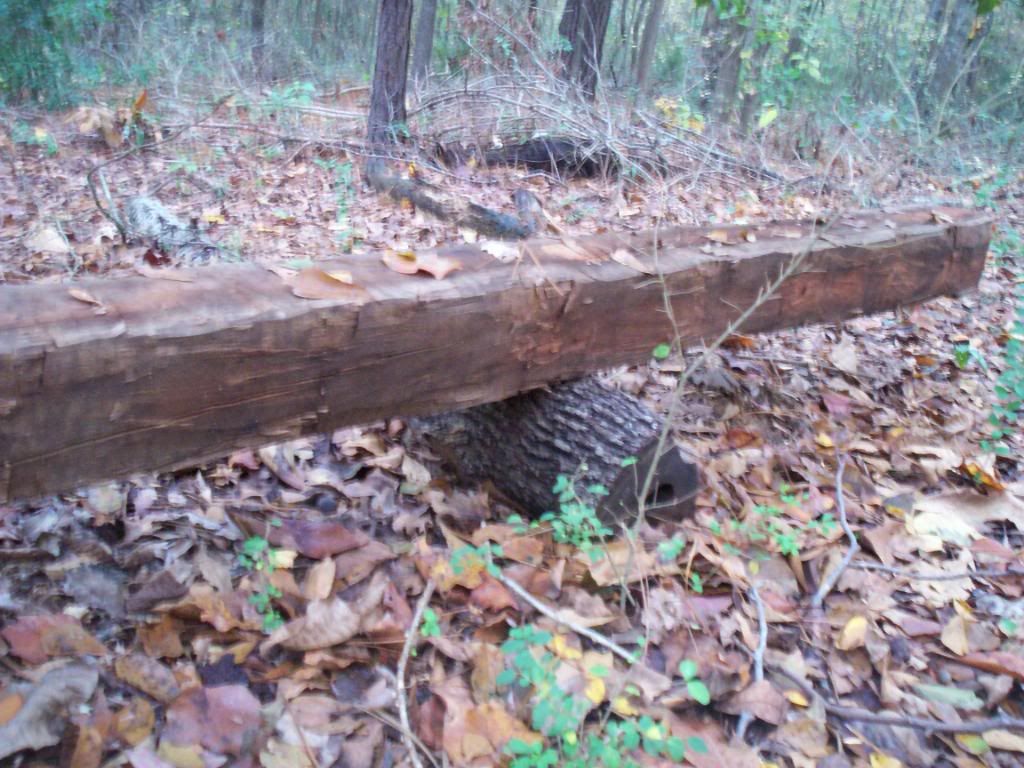
It's best to hew both the left and right sides before turning the log to hew the other two sides. It saves you a lot of handling and time. Here's the finished product:
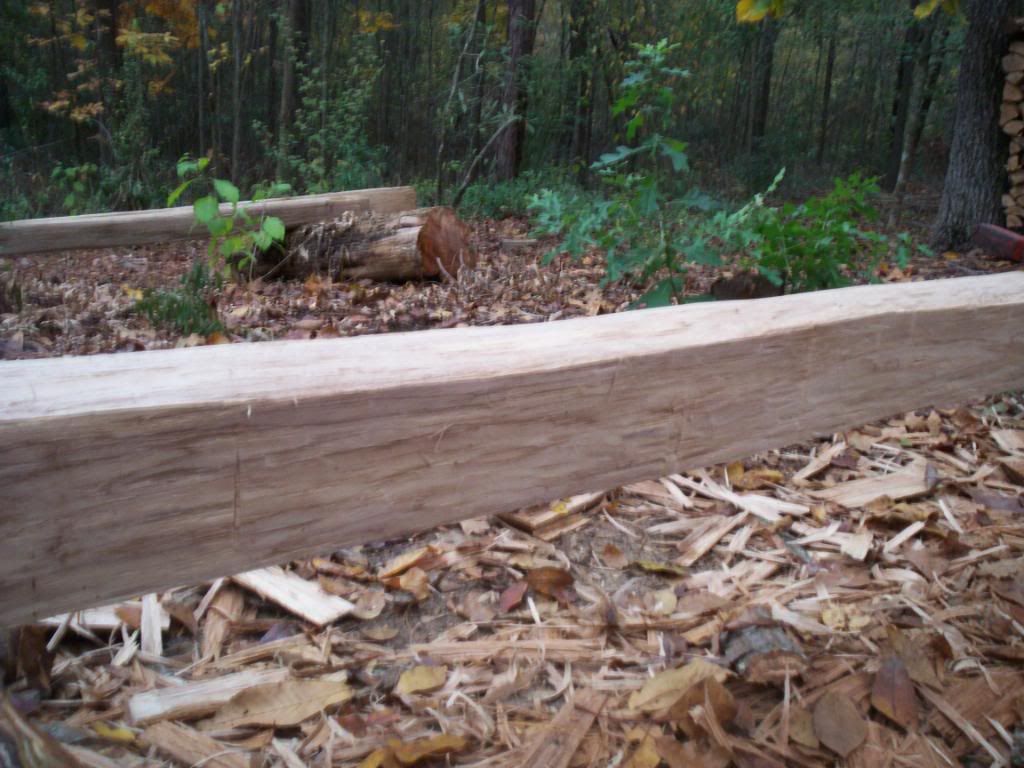
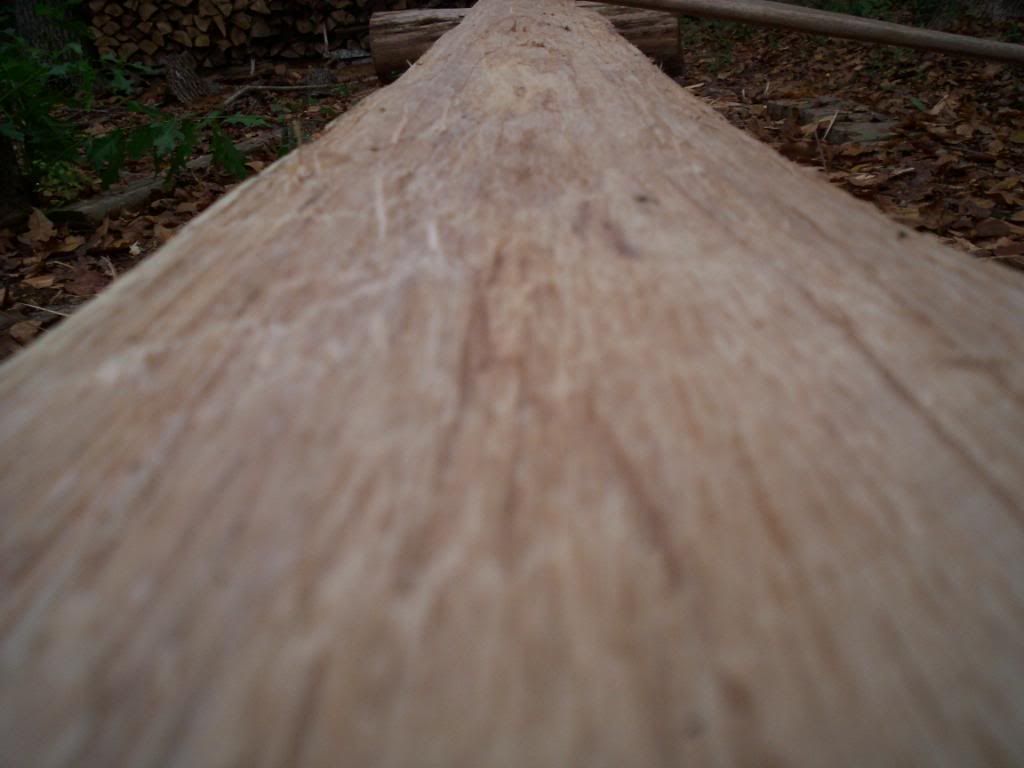
If you want to soften the tool-marks, get a draw-knife and, slicing perpendicular to the grain of the wood, lightly shave down the area around the marks. It'l make them less noticeable. I do this with the most obvious marks.
And there you have it. Step-by-step hewing. I apologize for my disjointed teaching style and my jumbled writing; I'm not a teacher or a great writer, but I like to think I'm a decent hand with a broad-axe. Still got a long way to go, though!
Enjoy.
But with my single-minded, stubborn self, dragging it in a straight line with brute force was as far as I thought on the subject. Don't have a horse, cow, or 4-wheeler to pull logs with. At any rate, three hours of pulling relocated an 18-foot, 10-inch diameter water oak log to the front yard, where I chopped a v-notch about a foot from each end and hooched it onto a pair of cedar logs I'm using for sawhorses. The notches at either end prevented the oak log from rocking atop the sawhorses.
Don't have any log dogs yet, but those are on the list. Might talk to a friend who welds and see if I can have some made pretty cheap. Now, the log's ready to be hewn. Normally, I just visualize the line and start notching, adjusting and altering my depth as I go. But in this case, I wanted to make a picture-perfect timber with good straight edges. So I broke out the square and chalk line.
Place a level or ruler against the small end of the log where you'd like to mark your top line. Make sure it's level, then use a marker or pencil to draw the line. Using a carpenter's square (the one pictured is from Scotland, and it's roughly 150 years old. Got it for free from an antique tool enthusiast) It's not perfectly true, which is likely why it was free...but I love it anyway.
Take a draw-knife (bought from the same guy as the square; it's a foot wide and cost $20) and, starting at the top left or top right of your square, shave the bark in a straight line from one end of the log to the other. This will allow your chalk line to pop without catching or smearing on the rough bark. Don't shave the whole log or it'll be wet and slippery. Just shave in a line the full length of the log.
Drive a nail into the end of the log, in line with your top right or left corner, then hook a chalk line to the nail, stretch it across the log in a straight line, and pop a line. That line will guide the depth of your notches later on. Mark your four sides on the large end of the log, using the chalk line to line up your square.
Stand on top of the log and swing the axe down and between your legs. Notch to the line, or just before it, depending on the number and depth of the tool marks you want showing on the finished product.
Notch about 6-12 inches apart. Once you finish, your log will look like this:
These notches are wide and messy, but they improved with each side of the log that I worked on. The tighter and more v-shaped you can make them, the easier your life will be during the next step. Now that you're done notching, start at the large end of the log and split off the "juggles". Juggles, as they're called, are the chunks of wood between your notches. Swing the axe at about a 45 degree angle into the edge of the juggle, and it ought to split cleanly away from the log. If not, just work your axehead deeper and try to pop it loose. This step is called, as you might expect, juggling.
When you're finished juggling the log, it'll look like this:
Now, get back on the log and use your felling axe to find high spots or sections that didn't pop off to the line and score them lightly. This is the prep work for your broad-axe. It allows you to spend just a few minutes hewing with the broad-axe instead of hours bent over with that heavy monster. The more work you can do with the smaller axe, the better off you'll be. After scoring, your log will look like this:
Now you're all set. Before beginning work with the broad-axe, get your juggles and line them up on the ground beneath the log, running down it's length. This will give your broad-axe a cushion of wood to slice into if you miss the log or swing too hard and follow through to the ground. Otherwise, you'll dull the blade on dirt and rocks.
Starting at the large end, use your broad-axe to shave off the scored portion of the log, hopefully leaving a smooth, flat surface behind. Work backward toward the small end. It's much easier to hew working backward than it is to lean forward and work ahead.
When you reach the end of the log, it should be smooth and flat, with a few tool-marks here and there where you might have cut too deep or too close to the edge. I like to call those"character marks".
You'll drive yourself crazy trying to get a timber without them, or you'll spend so much time on one log that hewing ceases to be fun and productive. It CAN be done, but it's not worth the time and effort, to me. If you're a perfectionist, have at it! Otherwise, accept a few marks and start on the next log.
It's best to hew both the left and right sides before turning the log to hew the other two sides. It saves you a lot of handling and time. Here's the finished product:
If you want to soften the tool-marks, get a draw-knife and, slicing perpendicular to the grain of the wood, lightly shave down the area around the marks. It'l make them less noticeable. I do this with the most obvious marks.
And there you have it. Step-by-step hewing. I apologize for my disjointed teaching style and my jumbled writing; I'm not a teacher or a great writer, but I like to think I'm a decent hand with a broad-axe. Still got a long way to go, though!
Enjoy.
Monday, November 7, 2011
How (not) to hew a log
I first tried my hand at squaring a log some months ago. I'd read several tutorials, watched a few youtube videos, and collected a motley assortment of tools for the job. Didn't have a broad-axe, didn't have a drawknife, a bark-peeling spud, or ....well, anything. But I did have a bow saw, a felling axe, and a foot adz; look out, world!
I felled a long, slim water oak and limbed it, bucked it into sections, and found a semi-flat spot (we live on a hill, so there are no truly flat spots) to lay out the butt log. It was about 10 feet long. I used the bow saw to make a notch in the top face of the log every 6 inches or so, then straddled the log and swung the adz between my feet. The curved blade caught in the grain of the oak and tore away 6-inch sections. Then I moved farther down the log, aimed at another section, and let fly. It left a nice, smooth surface that almost looked planed. Problem was, I'd severely misjudged the depth of my notches. They were about a half-inch deeper than needed, so there was a series of very noticeable half-inch notches down the length of my awesomely smooth timber.
My second attempt was another section of the same tree. It worked out great, but the end of the log split wide open within a couple of days and ruined my celebration. The wood itself is partially to blame for that. Water oak is very prone to checking and splitting; that's why I decided to use it for my practice timbers. If they split, I just use them for firewood. I also learned not to leave a drying timber in full sun, or it'll dry too fast and crack, warp, twist, etc.

My third attempt was the game-changer. This time ...I had a secret weapon: a century-old, foot-wide, cast-steel broadaxe. It cost me $20 on ebay. Certainly not a top quality product like a hand-forged Gransfors axe, but it holds an edge well and gets the job done. I filed the pits from the edge and fashioned a home-made oak handle.
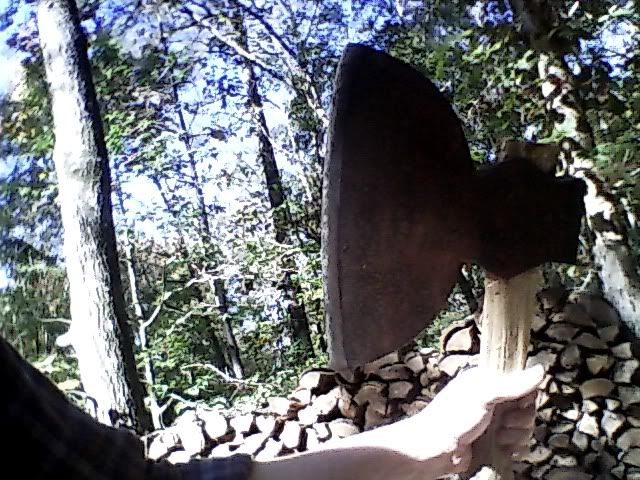
I still wasn't entirely certain how to use it. But it couldn't be THAT hard, right? After a particularly fierce thunderstorm, I found a large cherry tree blown down in our woods. A long section of the trunk was thick and straight, so I cut it loose and rested it lengthwise atop two sections of cordwood. After peeling the log, which had a sickly sweet odor like mashed cherries, I set to work cutting notches, this time with a felling axe. Then I hefted the new broadaxe and gave it a swing. It chipped away like a champ. The log ended up roughly square, a little ragged, and much better than my previous attempts.
But it still wasn't good enough. The hewed faces of the log didn't have that mirror-smooth finish and the same irregularly-spaced tool-marks like the vintage timbers I'd seen online. It was back to the drawing board for Paul Bunyan.
Time passed, trees fell, and I tried various different methods from widely differing sources. Everything from Japanese master carpenters to buckskinners who reenact the days of Lewis and Clarke, and each advised something different. Each produced varying results. I managed a couple of fairly even 15-foot oak timbers, but something still wasn't right. I had a gut feeling that I was missing something or skipping a step.
Then I found the ultimate guide. While searching for hewing tutorials, I ran across a website for tie hackers. Tie hackers are the hard-bitten old gents who, up until the 1940's, spent 12-hour days in the woods hewing ties for the railroad. They were never paid much for the job, so a man had to work fast and produce good ties to make a living. Thus, they refined hewing techniques to an art. A .pdf document on the site detailed their methods, accompanied by a series of drawings that illustrated the process perfectly. It filled in a lot of holes for me and answered several questions.
In my next post, we'll go over the tie hackers' drawings and see how to hew a log properly. I'll post a picture of my latest attempt, and I think you'll agree -- those old-timers knew a thing or two.
I felled a long, slim water oak and limbed it, bucked it into sections, and found a semi-flat spot (we live on a hill, so there are no truly flat spots) to lay out the butt log. It was about 10 feet long. I used the bow saw to make a notch in the top face of the log every 6 inches or so, then straddled the log and swung the adz between my feet. The curved blade caught in the grain of the oak and tore away 6-inch sections. Then I moved farther down the log, aimed at another section, and let fly. It left a nice, smooth surface that almost looked planed. Problem was, I'd severely misjudged the depth of my notches. They were about a half-inch deeper than needed, so there was a series of very noticeable half-inch notches down the length of my awesomely smooth timber.
My second attempt was another section of the same tree. It worked out great, but the end of the log split wide open within a couple of days and ruined my celebration. The wood itself is partially to blame for that. Water oak is very prone to checking and splitting; that's why I decided to use it for my practice timbers. If they split, I just use them for firewood. I also learned not to leave a drying timber in full sun, or it'll dry too fast and crack, warp, twist, etc.

My third attempt was the game-changer. This time ...I had a secret weapon: a century-old, foot-wide, cast-steel broadaxe. It cost me $20 on ebay. Certainly not a top quality product like a hand-forged Gransfors axe, but it holds an edge well and gets the job done. I filed the pits from the edge and fashioned a home-made oak handle.
I still wasn't entirely certain how to use it. But it couldn't be THAT hard, right? After a particularly fierce thunderstorm, I found a large cherry tree blown down in our woods. A long section of the trunk was thick and straight, so I cut it loose and rested it lengthwise atop two sections of cordwood. After peeling the log, which had a sickly sweet odor like mashed cherries, I set to work cutting notches, this time with a felling axe. Then I hefted the new broadaxe and gave it a swing. It chipped away like a champ. The log ended up roughly square, a little ragged, and much better than my previous attempts.
But it still wasn't good enough. The hewed faces of the log didn't have that mirror-smooth finish and the same irregularly-spaced tool-marks like the vintage timbers I'd seen online. It was back to the drawing board for Paul Bunyan.
Time passed, trees fell, and I tried various different methods from widely differing sources. Everything from Japanese master carpenters to buckskinners who reenact the days of Lewis and Clarke, and each advised something different. Each produced varying results. I managed a couple of fairly even 15-foot oak timbers, but something still wasn't right. I had a gut feeling that I was missing something or skipping a step.
Then I found the ultimate guide. While searching for hewing tutorials, I ran across a website for tie hackers. Tie hackers are the hard-bitten old gents who, up until the 1940's, spent 12-hour days in the woods hewing ties for the railroad. They were never paid much for the job, so a man had to work fast and produce good ties to make a living. Thus, they refined hewing techniques to an art. A .pdf document on the site detailed their methods, accompanied by a series of drawings that illustrated the process perfectly. It filled in a lot of holes for me and answered several questions.
In my next post, we'll go over the tie hackers' drawings and see how to hew a log properly. I'll post a picture of my latest attempt, and I think you'll agree -- those old-timers knew a thing or two.
Friday, November 4, 2011
How it all started...
My name's Chris. I live in south Mississipi, and I'm tired.
Tired of sitting still, tired of feeling my blood congeal in my veins while I stare at a computer screen for 9 hours each day, and tired of this fast-paced, selfish life we lead. It's time to turn back the clock and rediscover the honest pleasure of a hard day's work and, in the process, craft a strong, beautiful home for me and my family.
Our story starts with a gift. My wife and I were in our early twenties, and we lived with her great-grandfather. He was a 90 year-old dementia patient who needed constant supervision, so we cooked, cleaned, and tried to keep him functioning and happy for as long as possible. The old gent eventually got to a point where we couldn't care for him anymore; his daughter, Sue, (my wife's grandmother) contacted a nursing home near Lafayette, Louisiana and had him placed under their care. To stay close to him, she moved to Lafayette as well.
Here's where the miracle happens. Before she moved, Sue lived in a single-wide trailer on a wooded 5-acre plot several miles outside the city. Most of the neighbors have pastureland and livestock, and some devote their land to pine plantations. With its tall trees and abundant wildlife, it's a beautiful place.
In an act of true generosity, she handed the place to my wife and me, no strings attached, along with a pickup truck and a shed full of tools that had belonged to her husband. To say we were flabbergasted is an understatement! Feeling slightly overwhelmed by it all, we started the process of moving into our first home. Until this point, I'd been unable to find a job that paid well enough to buy a home, so I'd very nearly given up on finding a place of our own.
But now--praise the Lord--we had land, a home, two vehicles, a new baby, and a new job. I wandered out to the old shed and started rummaging around, only to wind up knee deep in pure gold! Well, it was gold to me. I found two axes, an adz, a working chainsaw, and more hand tools than I could count.
I hefted one of the axes and glanced over my shoulder, catching sight of a tall water oak in our front yard. My inner five year-old rose to the surface and, with a speculative gleam in bloodshot, computer-tired eyes, I approached the tree.
I'd grown up in south Mississippi with a wood-wise grandfather who, as he puts it, "isn't quite civilized", so felling a tree was no great mystery. I'd seen it done a hundred times and performed the feat myself a few times after hurricane Katrina damaged half the trees in our yard and tossed an exceptionally large oak across the roof. But I'd never done it with an axe.
The first stroke bit deep into green wood, and the second carved out a small notch. I started to get a feel for the old axe, and applied every fiber of muscle in my body to bringing down that water oak. Finally, after I'd cut a deep wedge and felling notch, I heard the first ominous crackle. Time stood still as the big log swayed in the gentle breeze, and all I could do was look up and watch in awe as the tree groaned, voiced a splintering, cracking protest, and arced to the ground. It slammed into the dirt with a pulverizing "boom," and I let loose a war-whoop, raising my axe and capering down the length of the fallen trunk like a backwoods madman.
A trip to the farm supply store netted a splitting maul and a pair of wedges, and the tree quickly transformed into a neatly-stacked pile of firewood. I was hooked. Every chance I got, I'd drag another oak from the woods and cut, split, and stack it. The big "whump" of a log slamming into the ground, the whine of a chainsaw as I cut it into 16-inch lengths, and the solid whack of the splitting maul were music to my ears.
The wife and I had discussed needing to push the treeline back from our trailer in case another Katrina came along, so I was checking an item off the honey-do list and enjoying myself at the same time. And as the wood dried, my then 4 year-old son Dominic would cajole me into using the fire-pit on our deck for roasting marshmallows. Everybody wins!
I searched the "local" bookstore (which is a 30-minute drive from home) and found a book by Frank and Stephen Philbrick called "The Backyard Lumberjack". It provided a wealth of information, and I was slightly relieved to find out I'm not the only crazy man who loves swinging an axe. But then I saw something else...a book on building log cabins. That inner 5 year-old who loved his Lincoln Logs pointed at it, and I bought the book.
It re-awakened every pioneer dream I'd had as a kid, every half-remembered urge to carve a life for myself out of the woods and build with my own two hands. Well, that's being slightly dramatic, but you get the picture! Every American boy grows up wanting a log cabin. It's in our DNA. So I scoured the internet and read every shred of information I could find about log structures, everything from the websites of massive log-building schools to the old-time Appalachian wisdom of men like Charles McRaven.
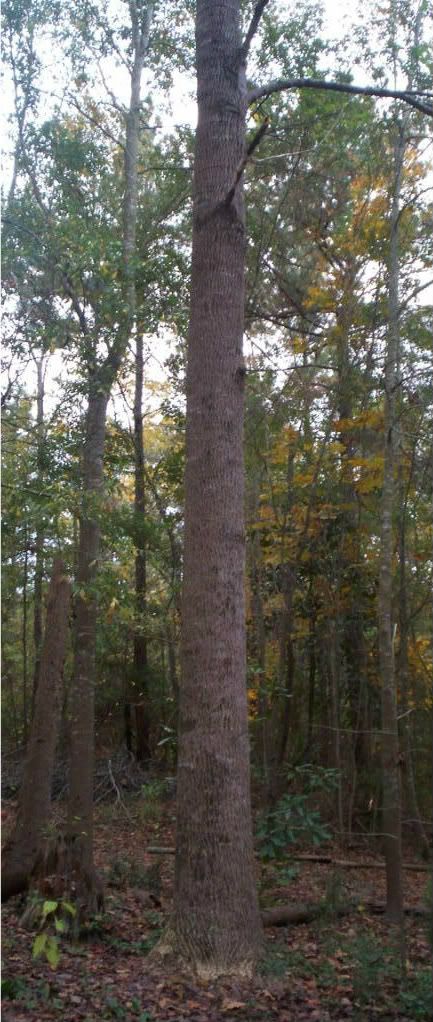
And I started looking around the property. The first thing I noticed was a tall, straight tree that I couldn't identify. The bark looked vaguely like a hickory, but the leaves were vastly different. These trees were everywhere, and they often reached 30-40 feet before the first limbs forked out. After consulting a book about trees, I realized they were tulip poplars, sometimes called "Yellow Poplar" by the old-timers around here (or "yaller poplar", if you want it in the vernacular). I'd never seen them outside of ornamental gardens and well-tended yards, so this was a shocker for me. I'd also just finished reading about pioneers in this area using poplar logs for their cabins. The gears in my brain started clicking, and I went back to my research.

In the moist, humid climate of south Mississippi, round-log cabins don't seem to last long without careful maintenance and chemical preservatives. I wanted something I could trust to last long after I'm gone, so I began looking at ways to combat the ever-present rot problem. My eyes fell on a page titled "Hewn-Log Homes", and I was off to the races.
Hewing logs removes the sapwood, which is known for attracting insects, fungi, and other nasties, leaving you with a square, flat-sided log of pure heartwood which, if kept dry, will last much longer than the builder. Then it was back to the internet and Google, performing searches on every variation of the word "hew" that I could imagine. In every tutorial I found, the proper tool for the job was a wide-bladed axe called a broad-axe. In my next post, I'll describe my first attempt at hewing a log and include pictures for those people (like me) who need to see the process to really grasp it.
I warn you--it isn't pretty! Neither was the second attempt, or the third. Stay tuned!
Tired of sitting still, tired of feeling my blood congeal in my veins while I stare at a computer screen for 9 hours each day, and tired of this fast-paced, selfish life we lead. It's time to turn back the clock and rediscover the honest pleasure of a hard day's work and, in the process, craft a strong, beautiful home for me and my family.
Our story starts with a gift. My wife and I were in our early twenties, and we lived with her great-grandfather. He was a 90 year-old dementia patient who needed constant supervision, so we cooked, cleaned, and tried to keep him functioning and happy for as long as possible. The old gent eventually got to a point where we couldn't care for him anymore; his daughter, Sue, (my wife's grandmother) contacted a nursing home near Lafayette, Louisiana and had him placed under their care. To stay close to him, she moved to Lafayette as well.
Here's where the miracle happens. Before she moved, Sue lived in a single-wide trailer on a wooded 5-acre plot several miles outside the city. Most of the neighbors have pastureland and livestock, and some devote their land to pine plantations. With its tall trees and abundant wildlife, it's a beautiful place.
In an act of true generosity, she handed the place to my wife and me, no strings attached, along with a pickup truck and a shed full of tools that had belonged to her husband. To say we were flabbergasted is an understatement! Feeling slightly overwhelmed by it all, we started the process of moving into our first home. Until this point, I'd been unable to find a job that paid well enough to buy a home, so I'd very nearly given up on finding a place of our own.
But now--praise the Lord--we had land, a home, two vehicles, a new baby, and a new job. I wandered out to the old shed and started rummaging around, only to wind up knee deep in pure gold! Well, it was gold to me. I found two axes, an adz, a working chainsaw, and more hand tools than I could count.
I hefted one of the axes and glanced over my shoulder, catching sight of a tall water oak in our front yard. My inner five year-old rose to the surface and, with a speculative gleam in bloodshot, computer-tired eyes, I approached the tree.
I'd grown up in south Mississippi with a wood-wise grandfather who, as he puts it, "isn't quite civilized", so felling a tree was no great mystery. I'd seen it done a hundred times and performed the feat myself a few times after hurricane Katrina damaged half the trees in our yard and tossed an exceptionally large oak across the roof. But I'd never done it with an axe.
The first stroke bit deep into green wood, and the second carved out a small notch. I started to get a feel for the old axe, and applied every fiber of muscle in my body to bringing down that water oak. Finally, after I'd cut a deep wedge and felling notch, I heard the first ominous crackle. Time stood still as the big log swayed in the gentle breeze, and all I could do was look up and watch in awe as the tree groaned, voiced a splintering, cracking protest, and arced to the ground. It slammed into the dirt with a pulverizing "boom," and I let loose a war-whoop, raising my axe and capering down the length of the fallen trunk like a backwoods madman.
A trip to the farm supply store netted a splitting maul and a pair of wedges, and the tree quickly transformed into a neatly-stacked pile of firewood. I was hooked. Every chance I got, I'd drag another oak from the woods and cut, split, and stack it. The big "whump" of a log slamming into the ground, the whine of a chainsaw as I cut it into 16-inch lengths, and the solid whack of the splitting maul were music to my ears.
The wife and I had discussed needing to push the treeline back from our trailer in case another Katrina came along, so I was checking an item off the honey-do list and enjoying myself at the same time. And as the wood dried, my then 4 year-old son Dominic would cajole me into using the fire-pit on our deck for roasting marshmallows. Everybody wins!
I searched the "local" bookstore (which is a 30-minute drive from home) and found a book by Frank and Stephen Philbrick called "The Backyard Lumberjack". It provided a wealth of information, and I was slightly relieved to find out I'm not the only crazy man who loves swinging an axe. But then I saw something else...a book on building log cabins. That inner 5 year-old who loved his Lincoln Logs pointed at it, and I bought the book.
It re-awakened every pioneer dream I'd had as a kid, every half-remembered urge to carve a life for myself out of the woods and build with my own two hands. Well, that's being slightly dramatic, but you get the picture! Every American boy grows up wanting a log cabin. It's in our DNA. So I scoured the internet and read every shred of information I could find about log structures, everything from the websites of massive log-building schools to the old-time Appalachian wisdom of men like Charles McRaven.
And I started looking around the property. The first thing I noticed was a tall, straight tree that I couldn't identify. The bark looked vaguely like a hickory, but the leaves were vastly different. These trees were everywhere, and they often reached 30-40 feet before the first limbs forked out. After consulting a book about trees, I realized they were tulip poplars, sometimes called "Yellow Poplar" by the old-timers around here (or "yaller poplar", if you want it in the vernacular). I'd never seen them outside of ornamental gardens and well-tended yards, so this was a shocker for me. I'd also just finished reading about pioneers in this area using poplar logs for their cabins. The gears in my brain started clicking, and I went back to my research.

In the moist, humid climate of south Mississippi, round-log cabins don't seem to last long without careful maintenance and chemical preservatives. I wanted something I could trust to last long after I'm gone, so I began looking at ways to combat the ever-present rot problem. My eyes fell on a page titled "Hewn-Log Homes", and I was off to the races.
Hewing logs removes the sapwood, which is known for attracting insects, fungi, and other nasties, leaving you with a square, flat-sided log of pure heartwood which, if kept dry, will last much longer than the builder. Then it was back to the internet and Google, performing searches on every variation of the word "hew" that I could imagine. In every tutorial I found, the proper tool for the job was a wide-bladed axe called a broad-axe. In my next post, I'll describe my first attempt at hewing a log and include pictures for those people (like me) who need to see the process to really grasp it.
I warn you--it isn't pretty! Neither was the second attempt, or the third. Stay tuned!
Subscribe to:
Posts (Atom)